Quantcast
Channel: VMM – Darryl van der Peijl
Viewing all 26 articles
Browse latest View live

VM Network Wizard fails with errorcode 12416

$
0
0

I found a bug in the creation of VM networks.
I received the error:

VMM is unable to process one of the provided parameters for the cmdlet (New-SCVMSubnet):

Cannot convert ‘System.Object[]‘ to the type ‘Microsoft.SystemCenter.VirtualMachineManager.LogicalNetworkDefinition’ required by parameter ‘LogicalNetworkDefinition’. Specified method is not supported

ID: 12416

I created a Network site called “ABC” on my logical network “Internet” and added a VLAN and IP Subnet:

LN_NS1

I entered the name of the VM Network in the “Create VM Network Wizard”

LN_NS2

Specified the right VLAN and subnet I just created in the logical network:

LN_NS3

Hit “Finish” and got the following error:
LN_NS4

The VM Network has been created, but it has no VM Subnets assigned.
LN_NS5
LN_NS6

The following Powershell scripts is used for the creation of the VM Network and Subnet VLAN.
In the scripts it shows the Get-SCLogicalNetworkDefinition:

$logicalNetwork = Get-SCLogicalNetwork -Name "Internet" -ID "ab0b05a3-92f7-4ae3-aed7-23e5e1d85824"
$vmNetwork = New-SCVMNetwork -Name "ABC - VLAN10" -LogicalNetwork $logicalNetwork -IsolationType "VLANNetwork"
Write-Output $vmNetwork
$logicalNetworkDefinition = Get-SCLogicalNetworkDefinition -Name "ABC"
$subnetVLAN = New-SCSubnetVLan -Subnet "10.10.10.0/24" -VLanID 10
$vmSubnet = New-SCVMSubnet -Name "ABC - VLAN10_0" -LogicalNetworkDefinition $logicalNetworkDefinition -SubnetVLan $subnetVLAN -VMNetwork $vmNetwork

The reason why this script fails is because I have another Logical Network called “Switch” and on this I have a network site called “ABC” as well.
So when the $logicalNetworkDefinition = Get-SCLogicalNetworkDefinition -Name “ABC” runs it will receive two Logical Network Definitions.
This seems very much to be a bug, I dont understand why the Get-SCLogicalNetworkDefinition cmdlet doesn’t use a Unique Identifier.

LN_NS7

When I rename the Network Site on Infra-Switch to “ABD” the “Create VM Network Wizard” runs fine.

You could workarround this issue by editing the powershell script and using it instead of the wizard.
Add the name of the Logical Network Definition in the script:

$logicalNetwork = Get-SCLogicalNetwork -Name "Internet" -ID "ab0b05a3-92f7-4ae3-aed7-23e5e1d85824"
$vmNetwork = New-SCVMNetwork -Name "ABC - VLAN10" -LogicalNetwork $logicalNetwork -IsolationType "VLANNetwork"
Write-Output $vmNetwork
$logicalNetworkDefinition = Get-SCLogicalNetworkDefinition -Name "ABC" -LogicalNetwork $logicalNetwork
$subnetVLAN = New-SCSubnetVLan -Subnet "10.10.10.0/24" -VLanID 10
$vmSubnet = New-SCVMSubnet -Name "ABC - VLAN10_0" -LogicalNetworkDefinition $logicalNetworkDefinition -SubnetVLan $subnetVLAN -VMNetwork $vmNetwork

Got a Microsoft support case running.

Update:

Bug accepted by Microsoft, “this will be addressed in future release.”


Enabling Jumbo Frames on Hyper-V Switch

$
0
0

So, you have enabled Jumbo Frames on your NIC’s and vNIC’s, but your hosts are not not doing Jumbo Frames?
This is because the Hyper-V switch still has a MTU of 1500 and the good thing is…
There is a way to enable Jumbo Frames on your Hyper-V Switch!

The {4D36E972-E325-11CE-BFC1-08002BE10318} subkey in the registry represents the class of network adapter devices that the system supports.
The full registry path: HKLM:\SYSTEM\CurrentControlSet\Control\Class\{4D36E972-E325-11CE-BFC1-08002BE10318}
In the subkey you will find many numeric subkeys, every Virtual NIC has it’s own key.
If you click trough these keys you will see multiple keys with the “driverdesc” shown as “Hyper-V Virtual Ethernet Adapter”

jumbo1

If you change the MTU/Jumbo settings of your Virtual NIC, the change is visible here if you refresh the view.
Virtual NIC’s have a the Characteristics of “a1″ (161) but the virtual switch has an other Characteristics property “29″ (41).
jumbo2

Change the *JumboPacket setting to “9014″
The setting will be active after a reboot of the server.

I made a little powershell script to change the jumbo settings:

$RegKey ="HKLM:\SYSTEM\CurrentControlSet\Control\Class\{4D36E972-E325-11CE-BFC1-08002BE10318}"
Get-ChildItem -Path $RegKey -ErrorAction SilentlyContinue| % {
$path = $_.PSPath
Get-Itemproperty $path | where {$_.driverdesc -eq "Hyper-V Virtual Ethernet Adapter" -and $_.Characteristics -eq "41"} | % {
Set-ItemProperty $path -Name "*JumboPacket" -Value "9014"
}
}

After the reboot you can test jumbo frames using the ping command.

Ping -f -l 8000 192.168.0.2

The “-f” parameter does not allow packets to be fragmented.
The “-l” parameter specifies the size of the packet, in this case we use a large packet (jumbo frame).

If you get reply’s everything works great!

** Change settings and use the script on own risk **

Monitoring VMM Jobs with JobVariable

$
0
0

With the -JobVariable parameter you can create a temporary variable that contains the status (and other good stuff) of the created job.
This variable will only be available in the current session, it will not be globally available.

The jobvariable will be converted in a variable, you can only set text as -jobvariable.
I used “CreateVMJob”, and this will be converted to $CreateVMJob. See below for a example.

# Filename:        SimpleCreateVM.ps1
# Description:     Creates a new virtual machine


# Connect to the VMM server
$VMMServer = Get-VMMServer "VMMServer01"
 
# Define the variables
$Template = Get-Template | where {$_.Name -eq "Template01"}
$VMHost = Get-VMHost | where {$_.ComputerName -eq "VMHost1"}
$VMName = "VM01"
$path = "C:\ClusterStorage\Volume1"
 

# Use the New-SCVirtualMachine cmdlet  
$createvm = New-SCVirtualMachine -template $template -Name $VMname -VMhost $VMHost -path $path -RunAsynchronously -jobvariable "CreateVMJob"
 
# Show all content of jobvariable
Write-Host $CreateVMJob | FL *

# Display the job progress.
While ($CreateVMJob.status -eq "Running")
{
   Write-Progress -activity "Creating new virtual machine" -status $CreateVMJob.progress
   Start-Sleep -seconds 3
}

No Run As account is associated with the host.

$
0
0

Error (26193)
No Run As account is associated with the host.

Recommended Action
You have not specified a Run As account for your host.

You can add a Run As account to the cluster using Powershell:

$Cluster = Get-SCVMHostCluster -Name CLUSTER_NAME
$RunAs = Get-SCRunAsAccount -Name "RUN_AS_ACCOUNT"
Set-SCVmHostCluster -VMHostCluster $Cluster -VMHostManagementCredential $RunAs

Set Port Classification based on VM Network

$
0
0

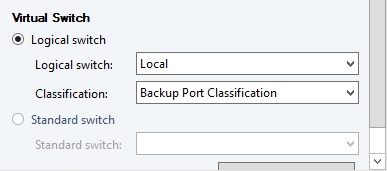
When you share one Logical network for two purposes like Management and Backup you might want to setup Port Classifications and Port Profiles.
With the Port Classifications and Port Profiles you can setup QOS so the backup traffic will never influence the management traffic.

One thing not to forget is to select the Port Profile, if you don’t select a port profile it will use the default port profile.
In this case it would use the Management Port Profile (with no max. bandwith) for backup traffic and that would not be a good idea, so I want to make sure the right Port Profile is selected.

portclass1

The following powershell script checks every Virtual Network Adapter in the specified VM Network.
If the Virtual Network Adapter in the specified VM Network does not have the right Port Classification, it will set it right.

$VMNetwork = Get-SCVMNetwork -VMMServer vmm.domain.local -Name "Backup"
$PortClassification = Get-SCPortClassification -VMMServer vmm.domain.local | where {$_.Name -eq "Backup Port Classification"}

Get-SCVirtualNetworkAdapter -VMMServer vmm.hypergrid.local -all | where {$_.VMNetwork -eq $VMNetwork -and $_.PortClassification -ne $PortClassification} | foreach {
$VM = Get-SCVirtualMachine -Name $_.NAME
$ID = $_.ID
$VirtualNetworkAdapter = Get-SCVirtualNetworkAdapter -VM $VM | where {$_.ID -eq $ID}

Set-SCVirtualNetworkAdapter $VirtualNetworkAdapter -PortClassification $PortClassification
}

I’m running this script every day 10:00 PM (before backup window starts) to make sure all the VM’s and Port Classifications are set right in case someone forgot.

0×80071008

$
0
0

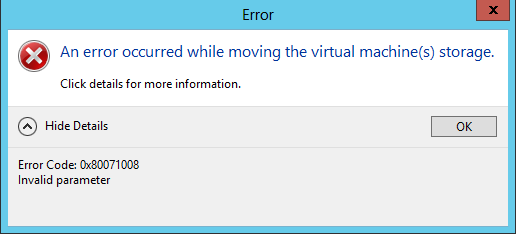
An error occurred while moving the virtual machine(s) storage.

Error Code: 0×80071008
Invalid parameter

0x80071008

Solution:
Unmount the mounted iso.

VMQ + Broadcom crashes servers

$
0
0

Yesterday I rebooted one of my hosts, and another host just crashed out of nowhere.
After some diggin’ this event shows in the eventviewer:

Event ID 113
Failed to allocate VMQ for NIC C777500C-AA7A-4F61-8862-0B8D09A2E967--A6F60352-0C31-4F30-9F27-F3FC8C1D5F87 (Friendly Name: VM) on switch DA1BEF5D-95DD-46FE-9E9E-43DE05FFCDDB (Friendly Name: Local). Reason - Maximum number of VMQs supported on the Protocol NIC is exceeded. Status = Insufficient system resources exist to complete the API.

Log Name:      System
Source:        Microsoft-Windows-Hyper-V-VmSwitch
Date:          8/22/2013 3:59:10 PM
Event ID:      113
Task Category: None
Level:         Error
Keywords:      
User:          S-1-5-83-1-3346485260-1331800698-2366333576-1743364617
Computer:      Hv01
Description:
Failed to allocate VMQ for NIC C777500C-AA7A-4F61-8862-0B8D09A2E967--A6F60352-0C31-4F30-9F27-F3FC8C1D5F87 (Friendly Name: VM) on switch DA1BEF5D-95DD-46FE-9E9E-43DE05FFCDDB (Friendly Name: Local). Reason - Maximum number of VMQs supported on the Protocol NIC is exceeded. Status = Insufficient system resources exist to complete the API.

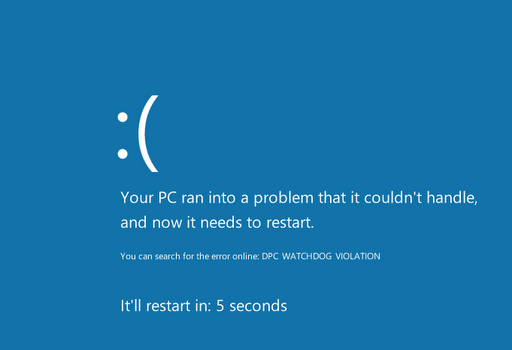
After a second,thirth and fourth crash I was able to get a bluescreen captured and google the Errorcode.

Full_DPC_Watchdog_Violation

Found this knowlegde base article / hotfix (December 2012!) http://support.microsoft.com/kb/2789962 which says “Assume that you have a Windows Server 2012-based computer that has many third-party drivers installed. ” and yes we have some broadcom drivers!
After installing this hotfix, the server still crashed. After disabling VMQ (Disable-networkadaptervmq) the crashing stopped.

Dumpfile:

Probably caused by : tcpip.sys ( tcpip+6b869 )


DPC_WATCHDOG_VIOLATION (133)
The DPC watchdog detected a prolonged run time at an IRQL of DISPATCH_LEVEL
or above.
Arguments:
Arg1: 0000000000000000, A single DPC or ISR exceeded its time allotment. The offending
    component can usually be identified with a stack trace.
Arg2: 0000000000000504, The DPC time count (in ticks).
Arg3: 0000000000000503, The DPC time allotment (in ticks).
Arg4: 0000000000000000

So it seems like a combonation with VMQ and Broadcom NIC’s.
When the Maximum number of VMQ’s is reached, problems occur.

VMM crashes when NIC team not completely up

$
0
0

Encountered some crashes today, after some troubleshooting I quickly found the issue, one of my NIC teams was not completely online.

Log Name:      VM Manager
Source:        Virtual Machine Manager
Date:          8/23/2013 9:49:14 AM
Event ID:      1
Task Category: None
Level:         Error
Keywords:      Classic
User:          N/A
Computer:      VMM1
Description:
System.NullReferenceException: Object reference not set to an instance of an object.
   at Microsoft.VirtualManager.Engine.Adhc.HostRefresher.GatherVirtualNetworkInformation(Host host, List`1 networkAdapters, List`1 vNics, ITaskContext taskContext)
   at Microsoft.VirtualManager.Engine.Adhc.HostRefresher.GatherAllInformation(Host host, Object agentRefreshSyncObj, Boolean checkIfClustered, Boolean refreshEventCapabilities, String& clusterName, Guid taskID, ITaskContext taskContext)
   at Microsoft.VirtualManager.Engine.Adhc.HostRefresher.RefreshLockedHost(Host host, Guid taskID, ITaskContext taskContext, Boolean checkClusterStatus)
   at Microsoft.VirtualManager.Engine.BitBos.VMRefresherBase.UpdateHostToResponding(Nullable`1& prevState)
   at Microsoft.VirtualManager.Engine.BitBos.VMRefresherBase.UpdateHostState(IVMComputerSystemSummary[]& vmComputers, Nullable`1& prevState)
   at Microsoft.VirtualManager.Engine.BitBos.VMRefresherBase.RunLightRefresher()
   at Microsoft.VirtualManager.Engine.BitBos.VMRefresherBase.UpdateHostAndVMs(VMRefresherType refresherType, Guid vmObjectId, VM tempVm)
   at Microsoft.VirtualManager.Engine.BitBos.VmLightRefresher.RefreshData(HostReference hostRef)
   at Microsoft.VirtualManager.Engine.RefreshDriver`1.RefreshThreadFunction(Object obj)-2147467261
Log Name:      VM Manager
Source:        Virtual Machine Manager
Date:          8/23/2013 9:49:14 AM
Event ID:      19999
Task Category: None
Level:         Error
Keywords:      Classic
User:          N/A
Computer:      VMM1
Description:
Virtual Machine Manager (vmmservice:5568) has encountered an error and needed to exit the process. Windows generated an error report with the following parameters:
Event:VMM20
P1(appName):vmmservice
P2(appVersion):3.1.6018.0
P3(assemblyName):E.Adhc.Operations
P4(assemblyVer):3.1.6018.0
P5(methodName):M.V.E.A.HostRefresher.GatherVirtualNetworkInformation
P6(exceptionType):System.NullReferenceException
P7(callstackHash):39b5

nicteamfail

After a NIC disable and enable, life is good.


Hyper-V / VMM MAC Addresses

$
0
0

In this post I’m going to talk about the MAC Address Pools in Hyper-V / VMM and the actual way they work.
It seems easy to setup and never look at it again but this can cause some serious issues.
There are many threads on technet forums about virtual machines changing MAC addresses and especially Linux virtual machines losing network connection.

Lets start at the beginning.
In the Hyper-V Manager you can set a specific range what addresses are allocated to the VM’s.
You can see/edit the range under the “Virtual Switch Manager”.

HV_macrange

So every new VM gets a MAC address in this range specified on the Hyper-V host.
You can view the MAC of a VM under “Settings > Network Adapter > Advanced Features”

VM_Mac

As you can see the allocated MAC is within the specified MAC range.
You could set your own MAC here, using the static MAC option.

But what happens when you have more than 1 host??

Hyper-V has an algorithm to deal with duplicate MAC addresses on a single host, but not across multiple hosts. 
So, if you not take care it is possible to accidentally deploy hosts with duplicate MAC address pools. 
Make sure you do not use the same range on different Hyper-V hosts!!

NOTE:
Once the MAC address pool is created when the Hyper-V role is installed, imaging the host will cause each Hyper-V server deployed using the image to have the same MAC address pool. Even if you sysprep the host before you image it, the registry values are not reset.

MAC Address Regeneration

When Live Migrating VM’s to a different host there’s no problem and the VM will keep the same MAC.
If there’s a different MAC range allocated on the new host the MAC changes when:
- VM is turned on from off state
- VM is restored from save state (Quick migration!)
- Antoher VM uses the same MAC.

If you’ve set a static MAC, the MAC moves between hosts.

Linux

Unlike Windows, Linux VM’s (Redhat, Centos, Ubuntu etc.) have the MAC address hardcoded in configuration files.
When the above situation occurs the VM will get a new MAC and loses network connectivity.
You will need to edit the network cfg’s and enter the new MAC to get the VM online.
Make sure you use static MAC addresses in this situation!

VMM – Virtual Machine Manager

In VMM a default MAC Address Pool is created with range 00-1D-D8-B7-1C-00 to 00-1D-D8-F4-1F-FF (3998720 addresses).
vmm_defaultmac

VM’s deployed with VMM can make use of this default pool when the NIC settings are set right.

vmm_mac

Dynamic = Get your MAC from the Hyper-V host
Static = Get your MAC from the VMM MAC address pool

Select static (also in templates and hardware profiles!) to make use of the default MAC Address Pool and overcome any MAC problems.
Once you allocated a MAC from the MAC pool the MAC stays static on all your Hyper-V hosts.
When you select “Static” and leave the value “00:00:00:00:00:00″ it will allocate a MAC from the MAC pool for you, you dont have to make up one ;-)
vmm_newmac

When deploying a virtual machine using the Hyper-V Manager on a host managed by SCVMM, the virtual machine will not use the SCVMM static MAC address pool, but will use the locally defined dynamic MAC address pool on the Hyper-V host when selecting “Dynamic”.
When selecting static here, you will need to make up a MAC.

Converting VM’s from VMware to Hyper-V in seconds (Part 1)

$
0
0

Finally!!!
A couple of months ago I started migrating from VMware to Hyper-v with frustrating speeds, 17MB/s, this is because of the file conversion which processes all data.
When searching for a better solution I came across this Youtube video:

After seeing this I jumped through the roof.
For this technology to work I needed a Netapp in Clustered mode with Ontap 8.2, and I didn’t have one laying around… till last week.

Converting VMDK to VHDX in seconds, HOW!?

We need a Netapp controller to do this trick.
Netapp has equipped their API with some great features, one of them is the cmdlet ConvertTo-NaVhdx. (alias ConvertTo-NcVhdx)
This Powershell cmdlet calls the Netapp API function which converts the file to VHDX by using Flexclone to clone the data blobs.
After the clone it rewrites the specific metadata in the header section of the VMDK which changes the format to a readable VHDX.
It seems like it only changes data in the header section of the file which is about 1mb in size!

With a simple script like below you can convert a disk in seconds from VMDK to VHDX.

Import-Module 'DataONTAP' -Verbose:$false

$NTAPUser = "admin"
$NTAPPassword = "$ecret"
$secpasswd = ConvertTo-SecureString $NTAPPassword -AsPlainText -Force
$mycreds = New-Object System.Management.Automation.PSCredential ($NTAPUser, $secpasswd)
$NTAP = Connect-NcController -Name 10.0.0.50 -EA Stop -Credential $mycreds -vserver vserver-01
       
$splat = @{}
$Splat = @{
'FollowParent'=$true
'SkipUnmap'=$true
}

ConvertTo-NcVhdx -SourceVmdk "/vol/nfs01/TestVM/TestVM.vmdk" -DestinationVhdx "/vol/nfs01/TestVM/TestVM.vhdx" @Splat

The following video shows the NFS share on the Netapp accessed through a windows server.
A VMWare VM called “TestVM2″ is stored here with the VMDK file we want to convert to VHDX.
Simply kicking off the above powershell script the VMDK (47GB) is converted in seconds.

You can see the VHDX file beeing created.
Next thing is to create a VM, attach the new disk to the VM, boot!

MAT (powered by Project Shift)

MAT is a very nice piece of powershell work from a collab between Migration Mark (Microsoft), Michael Greene (Microsoft) and Glenn Sizemore (NetApp).
MAT is the complete ready-to-go solution to use for VM migrations using a Netapp and the “magic” conversion technology.
When your Netapp controller is ready to go, MAT configs the controller with the right settings and creates a vserver etc etc.
Globally MAT stores the VM info from VMware into a database, when you fire off the convert function the disk will be converted and a new VM is created in Hyper-V with the new converted disk.
MAT uses the above functionality from Netapp Data Ontap and the The Data ONTAP PowerShell Toolkit to convert the disk in seconds.
You can find more info here and download it here
They also made a great video showing off MAT :-)

You can edit the MAT powershell code to your own needs.

Requirements:
Netapp Controller with ONTAP 8.2 or higher in clustered mode
Netapp Data ONTAP PowerShell Toolkit
Netapp Flexclone License

In Part 2 I will discuss how to setup all the above.
- Config the Netapp
- Add Netapp storage to VMM
- Converting VM’s from VMware to Virtual Machine Manager with all the settings.
- All the scripts used for collection of VM’s and creation of VM’s

Any questions already? Shoot!

ps. I’m having some trouble with the Youtube video sizes, working on it ;-)

Converting VM’s from VMware to Hyper-V in seconds (Part 2)

$
0
0

Converting VM’s from VMware to Hyper-V in seconds (Part 1)
Converting VM’s from VMware to Hyper-V in seconds (Part 2)

This part we will configure the Netapp controller so you can use it to convert VM’s from a VMware environment to a Hyper-V environment.
In this setup we use the NFS protocol for the ESX and SMB 3.0 for Hyper-V to present the storage.
We will use the Netapp SMI-S provider to connect Virtual Machine Manager with the Netapp controller.

Design

Well, every design is different.
In my environment I have 2 vlans, one for internal traffic (mgmt) and one for storage traffic (iscsi).
I’ve created a VM that will act as my Controller server, this is where the migration script will be running.
The migration script will use Powershell along with the VMM module, PowerCLI and the Netapp Data ONTAP module to get information from the various systems and actually fire off commands to create a VM or start the disk conversion from VMDK to VHDX.
I also installed the Netapp SMI-S agent on this machine but I will come back on that part later.

convertv2h_design

Configuring the Netapp controller

Requirements:
Netapp Controller with ONTAP 8.2 in clustered mode
Netapp Data ONTAP PowerShell Toolkit
Netapp Flexclone License

I’m expecting you have some knowledge about Netapp and the way to configure it.
We will use a script to configure the controller, but first you will need to create a aggregate using the “aggr create” syntax.

Next, a script will take care of the following tasks:

- Create vServer
- Enable CIFS
- Enable NFS
- Configure Networking
- Add controller to domain
- Configure DNS Settings
- Configure CIFS
- Configure NFS
- Create Volume
- Create CIFS Qtree Security
- Create NFS Qtree Security

The script can be downloaded >>>here<<<
The script is a part from the MAT toolkit, I’m not reinventing the wheel ;-)
I edited the script so it doesn’t make a CIFS share, we will do this with VMM.

Edit the Variables.xml file and supply the correct parameters for the XML values.
The script will read the XML file and use the parameters to configure the controller.
If the script runs successful, you will get the following result:
convertH2V_scriptresult

Netapp has also a nice tool available called “OnCommand”.
This is a web based GUI to view/configure the settings of the controller.

SMI-S Agent

Managing the Netapp controller from VMM means we need the Data ONTAP SMI-S Agent.
The Data ONTAP SMI-S Agent provides a standards based storage management interface that can be used to discover, monitor and manage NetApp storage systems, in this case for Virtual Machine Manager.
The SMI-S agent acts as a man in the middle, passing through information and commands.
convertH2V_smis
When the SMI-S Agent is in place we can create shares on the Netapp controller for placing VM’s through Virtual Machine Manager.

You can download the SMI-S Agent from the Netapp support site, you will need “Data ONTAP SMI-S Agent 5.0” as this version supports a Netapp Controller with ONTAP 8.2 in clustered mode.
You can install the agent about anywhere, i’ve installed it on the controller server but you could install it on your VMM server as well.
The installation is fairly simple.. next,next, finish.
Open up the Agent command prompt, can be found in the start menu.

First check if the service is running

smis cimserver status

Then add the Netapp controller to the agent using the following cmd

 smis add <IP> vsadmin <password> [-t <http/https>]

When everything is OK, you can retrieve the volumes on the Netapp controller with

smis volumes

convertH2V_smis2

Next, create a LOCAL account on the server the SMI-S agent is running.
When your done, add the local user to the SMI-S agent service with the following command
(I have created a local user named “Netapp”)

cimuser -a -u Netapp

convertH2V_smis3

This user will be used to grant permissions from Virtual Machine Manager to the SMI-S Agent service.

Note:
You will need to make the SMI-S connection on the Data port, not the MGMT port.
Keep this in mind when making your network design. I have routed VLANs so my controller server can connect to the data port of the netapp.
Note2:
The Netapp controller has a firewall build in, connection to the controller may be blocked by the firewall.
Disable the firewall using the following command (for testing purposes):
system services firewall modify -node <nodename> -enabled false

Adding NetApp SMI-S Storage to Virtual Machine Manager

First, make sure you have your DNS records right, also PTR record.

Open your VMM Console, Expand Fabric. Right click on Providers and click on “Add Storage Devices”. Then Click “Add a storage device that is managed by SMI-S provider”.

convertH2V_vmm1

Select “SMI-S CIMXML” and fill in the IP address of the server the SMI-S agent is running on.
convertH2V_vmm2

Click browse and create a new Run As account for the local user you created and click next

convertH2V_vmm3

The wizard will now Discover the Netapp controller through the SMI-S Agent and when done, it discovers the vServer and volume created with the script.
convertH2V_vmm3

Click next and select the right volume and storage classification, if you don’t have a storage classification already then create one.
convertH2V_vmm5
Click next to finish the wizard, all done.

The SMI-S agent is now showing under providers.

In the Fabric pane under “Classifications and Pools” you will see the created Storage classification and the assigned volume.
convertH2V_vmm8
Please note the selected “Pool ID”, we will use this ID to identify the volume when creating the SMB 3.0 share.

To create a SMB 3.0 share on the Netapp controller, right click on “File Servers” and “Create File Share”.
convertH2V_vmm9
In the dropdown you will see the same ID also shown in previous screenshot, meaning you will create a file share on the created volume on the Netapp controller.

Next, add the created SMB 3.0 fileshare to your cluster.
In the Fabric pane, go to the properties of your cluster, click “File Share Storage”, Add and type in the UNC path to the SMB share.
convertH2V_vmm10

Select a user account to “Access file shares for ongoing operations”.
This can be a domain user as the Netapp controller is a member of your domain.

When everything goes right, your now able to deploy VM’s to the SMB 3.0 fileshare.
VMM will automatically set access on the share for your hosts, you can check this using the OnCommand tool or login with SSH to your controller and use the following commands:

vserver cifs share access-control show

Or grant access to a specific host (don’t forget to add your VMM library server(s) for deploying from the library on the share.)

vserver cifs share access-control create -share share2 -user-or-group DOMAIN\VMMLIB1$ -permission Full_Control

Clustered Data ONTAP 8.2 CIFS/SMB Server Configuration Express Guide:
https://library.netapp.com/ecm/ecm_download_file/ECMP1287609/

All done!
We’ve configured the Netapp controller, setup the SMI-S agent and connected it to Virtual Machine Manager.
Now you should be able to access the SMB 3.0 fileshare we created and place VM’s on it with VMM.
The only thing left is to connect the Netapp storage over NFS with VMware.

In the next part I will show and explain:
- Converting VM’s from VMware to Virtual Machine Manager with all the settings.
- All the scripts used for collection of VM’s and creation of VM’s

Set Operating System based on Integration Services information

$
0
0

“Why is the “Install Virtual Guest Services” greyed out on some VM’s?” Because you have not selected an Operating system in VMM. :-)
The option is greyed out because VMM does not know the compatibility of the OS with intergration services.

We had a bunch of VM’s with operating system “Unknown” and in the Hyper-V manager I can see what OS is running on the VM but not in VMM.
Powershell to the rescue.

setos

This script will query all your hosts, and foreach VM running on this host it will check if it has an OS selected in VMM.
If that’s not the case it will try to read the current OS through Intergration Services which actually happens via WMI.

Notes:
-This only works for Windows VM’s
The naming convention in VMM of the operating systems failed :-) Intergration services shows “CentOS Linux release 6.0 (final)” and VMM “CentOS Linux 6 (64 bit)”
-Only running VM’s will be seen by the script (Intergration services must be running to read the OS)
-You will need the VMM powershell module
-You will need WMI acces to your hosts

$VMhosts = get-scvmhost

$VMhosts | foreach {
$VMhost = $_.name
$VMs = Get-SCVirtualMachine -vmhost $VMhost | where {$_.Operatingsystem -match "Unknown" -and $_.status -match "Running"}
$VMs | foreach {
$vmname = $_.name
$Operatingsystemname = $null
$OperatingSystem = $null
$vmobject = Get-WmiObject -Namespace root\virtualization\v2 -ComputerName $VMhost -Class Msvm_ComputerSystem -Filter "ElementName='$vmname'"
$GuestIntrinsicExchangeItems  = $vmobject.GetRelated("Msvm_KvpExchangeComponent").GuestIntrinsicExchangeItems

$GuestIntrinsicExchangeItems  | foreach {

       $GuestExchangeItemOSname = ([XML]$_).SelectNodes("/INSTANCE/PROPERTY[@NAME='Name']/VALUE[child::text()='OSName']")
       if ($GuestExchangeItemOSname -ne $null)
       {$OSname = $GuestExchangeItemOSname.SelectNodes("/INSTANCE/PROPERTY[@NAME='Data']/VALUE/child::text()").Value}  

       $GuestExchangeItemProcA = ([XML]$_).SelectNodes("/INSTANCE/PROPERTY[@NAME='Name']/VALUE[child::text()='ProcessorArchitecture']")
       if ($GuestExchangeItemProcA -ne $null)
       {$ProcessorArchitecture = $GuestExchangeItemProcA.SelectNodes("/INSTANCE/PROPERTY[@NAME='Data']/VALUE/child::text()").Value}    
}

# If architecture x86
If ($ProcessorArchitecture -eq 0) {
$text = "32-bit"
$Operatingsystemname = $OSname + ' ' + $text
}
# If architecture x64
If ($ProcessorArchitecture -eq 9) {
$text = "64-bit edition of"
$Operatingsystemname =  $text + ' ' + $OSname
}
$OperatingSystem = Get-SCOperatingSystem | where {$_.Name -eq $Operatingsystemname}
$OperatingSystem
#If OperatingSystem found, set on the VM.
if($OperatingSystem){
Set-SCVirtualMachine -VM $_ -OperatingSystem $OperatingSystem
}
}
}

Of course you can change the script to recognize other Operating systems, be my guest.
Use at your own risk!

Converting VM’s from VMware to Hyper-V in seconds (Part 3)

$
0
0

Converting VM’s from VMware to Hyper-V in seconds (Part 1)
Converting VM’s from VMware to Hyper-V in seconds (Part 2)
Converting VM’s from VMware to Hyper-V in seconds (Part 3)

In the previous 2 parts I explained what we can do with the Netapp conversion technology, in this part I will show how it’s done.

The MAT project is a neat piece of powershell, but still I wanted it to do some things different:

- Not using a database, get the info directly from the ESX hosts
- Create VM’s through Virtual Machine Manager (not directly on Hyper-V)
- Not uninstalling VMware tools automatically
- Not deleting snapshots automatically
- Pause the script after every migration, press enter to start a new one

Not using a database, get the info direct from the ESX hosts

The script is not dealing with any database anymore, I wanted it to be fast en clean and communicating directly with VMware.
If you fire off a conversion, it will get the VM info directly from VMware (CPU’s, Memory, Disks), So every piece that was depended on database information has been edited.

Create VM’s trough Virtual Machine Manager (not directly on Hyper-V)

The VM’s needed to be created through Virtual Machine Manager for a couple of reasons:
VM Networks and not everyone managing the VM’s could directly log on to the Hyper-V hosts.

All the powershell Hyper-v commands are replaces by the VMM powershell cmdlet’s.

Not uninstalling VMware tools automatically

To uninstall VMware tools, you need to know the Administrator username and password.
Every VM has different usernames and passwords, so a easy remote uninstall script didn’t do the trick.

Not deleting snapshots automatically

I did not know why the snapshots are made, or if they could be deleted.
The script now shows a warning if a snapshot exists.

Pause the script after every migration, press enter to start a new one

Ofcourse you want to convert hundreds of VM’s in one go and expect they run like nothing happened, let me kill that dream.
After every conversion the script stops untill you press enter again, so you can check the machine for problems (see below).

Problems I encountered converting VM’s to VMware

Because we are creating a new VM from scratch the OS sees all hardware as new devices, beware of the following:

- Disks can switch drive letter
- IP settings are gone

Also we had some issues with VM’s that did not support Integration Services (Windows 2008 SP1 for example).
Don’t get me started on Debian machines..

You can download the script here:

>> Convert Script <<

If you have any questions, please contact me through the comments or contact page.
Or on Twitter:
follow-me-twitter

Provisioning VM Networks

$
0
0

This script/Powershell functions can be used for (automatic) provisioning VM networks based on VLANs on existing Logical Network and switches in Virtual Machine Manager.

Create VM Network Function:
1. Check if VLAN already exist
2. Create Network site in logical network and add VLAN
3. Enable VLAN on Uplink Port Profile
4. Create VM Network

Remove VM Network Function:
1. Remove Logical Network Definition from Uplink Port Profile
2. Remove VM Network
3. Remove Logical Network Definition from Logical Network

<#
.Synopsis
   Provisioning VM Networks
.DESCRIPTION
   Add and Remove VM Networks on VLAN-based Logical Networks
.EXAMPLE
   CreateVLAN -LogicalNetwork = "Tenant Network" -VLANName = "Blue Network" -VLANID "999" -$VLANSubnet "10.10.10.0/24" -Hostgroup = "Amsterdam"
   RemoveVLAN -LogicalNetwork = "Tenant Network" -VLANName = "Blue Network"
.NOTES
   Version 1.0 - Initial Script
   Written by Darryl van der Peijl
   Date: 23.05.2014
   
   Check Uplink Port Profile name on line 40
   Use at own risk
#>


Function CreateVMNetwork {
    param($LogicalNetwork,$NetworkName,$VLANID,$VLANSubnet,$Hostgroup)

Download the script from the TechNet Gallery:
http://gallery.technet.microsoft.com/Provisioning-VM-Networks-93c209f0

Out-of-Band Management in a Windows Server 2012 R2 Hyper-V Environment

$
0
0

In this post we will discuss Out-of-Band Management of virtual machines running on Hyper-V, and a glimpse into the future. Hyper-V in Windows Server 2012 R2 has a large number of significant improvements, but there’s a new feature called Guest Services that hasn’t been much in the spotlight yet. I’ll provide a quick overview of Hyper-V Guest Services and also an example of how it can be used to perform out-of-band operations.

Guest Services
Guest Services are disabled by default on VMs. In order to use Guest Services, it needs to be enabled on each VM which will make use of it. To enable Guest Services on each VM, you can configure the checkbox setting shown in the screenshot below.

OutofBandMa1

And of course you can enable Guest Services with PowerShell, using the Enable-VMIntegrationService command.

Get-VM –Name “Test VM” | Enable-VMIntegrationService -Name “Guest Service Interface”

Guest Services leverages the Hyper-V Virtual Machine Bus (VMBus) to which each VM is connected. The VMbus is a communication mechanism used for inter-partition communication and device enumeration on systems with multiple active virtualized partitions. To bring it the easy way: The hypervisor and virtual machines are communicating with each other through the VMBus. For now, the only Out-of-Band operation Guest Services is supporting is the Copy-VMfile cmdlet.

With this cmdlet you can copy a file from a host into the VM.

$VM = Get-VM -Name “Test VM”
Copy-VMFile -VM $VM -SourcePath “C:\scripts\powershellscript.ps1″ -DestinationPath “C:\scripts\powershellscript.ps1″ -CreateFullPath -FileSource Host -Force

Out-of-Band Management
Out-of-band management (OOB), sometimes called lights-out management, involves the use of a dedicated management channel for device maintenance. The term “Out-of-Band” in this blog is actually referring to a way to manage machines without using network. Now you might think “Manage without network? why?”

With routed VLANs you can easily manage your VMs using remote PowerShell, but with network virtualization, although a very cool technology, it also introduces some big challenges. Network virtualization isolates the network meaning nobody can access the network without being in it. You may encounter a similar scenario with isolated development environments with VMs running in a DMZ, behind a Firewall or using ACLs. So, how are you going to manage VMs which you can’t reach through network connectivity?

Right! Out-of-Band Management

So the goal is to manage VMs running on Hyper-V without having to worry about what network the VM is on, or if it’s even connected to any network.

A Glimpse into the future
My prediction is that the Virtual Machine Manager and Hyper-V product teams are working hard to get this type of management arranged. Virtual Machine Manager will be the center of Out-of-Band management, shooting commands through the VMM agent to the Hyper-V host. The Hyper-V server will pass these commands (PowerShell of course) through the VMBus to the VM using Integration Services.

This way you can manage any VM, connected to any network.

Other System Center components could benefit from Out-Of-Band management also: monitor a VM while the network is down with Operation Manager, change a VM IP with Configuration Manager etc. Since much is focused on Microsoft Azure, I am assuming this kind of functionality will also be available on Microsoft Azure and Windows Azure Pack through the API’s.

How cool would it be to pass PowerShell commands from your laptop on a public airport Wifi to your VMs on Azure?

Is there a catch?
The question is if this functionality poses a potential risk for your VMs or even your whole environment. What would happen if the security of the APIs is breached, would it be possible to execute commands from within your VMs from anywhere. The Hyper-V Integration Services are running as a services with ‘Local System’ privileges, so in theory there will be no security restrictions within the VM.

OutofBandMa2

The above paragraph is of course speculative, but if a file copy through the VMBus is possible… I suspect anything is.

Let me know what your thoughts are on this subject, leave a comment!


Force Install Updates on Remote Computer

$
0
0

Microsoft does not give the functionality to Install Updates on Remote Computer out of the box, ofcourse there are some 3rd party tools but…
This powershell script will give you the ability to install windows updates on a remote computer without 3rd party programs.

The script will remotely create a scheduled task on the given computer with the needed powershell cmdlets to:

1. Search for updates
2. Download updates
3. Install updates

<#
.Synopsis
    Force Install Updates on Remote Computer
.DESCRIPTION
    Force Install Updates on Remote Computer using a scheduled task
.EXAMPLE
    InstallUpdates -Computer "server1.contoso.com" -User "Contoso\Administrator" -Password "Password"
.NOTES
    Version 1.0 - Initial Script
    Written by Darryl van der Peijl
    Date: 30.05.2014

    Use at own risk
#>


Function InstallUpdates {
param($Computer,$User,$Password)

$SecurePassword = ConvertTo-SecureString –String $Password –AsPlainText -Force
$Credential = New-Object –TypeName System.Management.Automation.PSCredential –ArgumentList $User, $SecurePassword

...

Download the script here:
http://gallery.technet.microsoft.com/scriptcenter/Force-Install-Updates-on-ef821f9a

Windows Azure Pack Update Script

$
0
0

Yesterday UR4 for Windows Azure Pack was released.
Download here: http://support2.microsoft.com/kb/2992027

So when downloading you need to select the download location and let the downloader do his job.
downloadUR4

All the downloads will be stored in separate folders, and in this folder you will find the CAB file needed.
UR4_folders
You will need to extract every single CAB file to get the MSI file to update a WAP role.
For me this was a little to much manual labor, Powershell to the rescue!

I’ve made a script that collects all CAB files in the folders and then extract the MSI files.
After that, the script installs the MSI files.

UR4_Update

Saved me at least 10 minutes, and 100 clicks ;-)

Download from the gallery: HERE

The post Windows Azure Pack Update Script appeared first on Darryl van der Peijl.

The configuration registry database is corrupt (0x800703F1)

$
0
0

Got the following error when creating a VM template in Virtual Machine Manager:

Error (2912)
An internal error has occurred trying to contact the vmms01 server: : .

WinRM: URL: [http://vmms01.mgmt.local:5985], Verb: [INVOKE], Method: [LoadSubkey], Resource: [http://schemas.microsoft.com/wbem/wsman/1/wmi/root/scvmm/P2VSourceFixup?RegFileName=C:\Users\SVC_VMM\AppData\Local\Temp\tmp6AB5.tmp]

The configuration registry database is corrupt (0x800703F1)

Recommended Action
Check that WS-Management service is installed and running on server vmms01.mgmt.local. For more information use the command "winrm helpmsg hresult". If vmms01.mgmt.local is a host/library/update server or a PXE server role then ensure that VMM agent is installed and running. Refer to http://support.microsoft.com/kb/2742275 for more details.

The problem is that the VM was already sysprepped.
Just start the VM, login with a user and you’re set. :)

The post The configuration registry database is corrupt (0x800703F1) appeared first on Darryl van der Peijl.

Scale-Out File Servers – DNS Settings

$
0
0

Scale-Out File Server (SOFS) is a feature that is designed to provide scale-out file shares that are continuously available for file-based server application storage such as Hyper-V. Scale-out file shares provide the ability to share the same folder from multiple nodes of the same cluster.

In this blog we assume you already have played around with SOFS and know the basics.

In this example I’m using a 2-node Windows Server 2012 R2 cluster with 4x 10GbE adapters.
NIC1 and NIC2 are dedicated for iSCSI traffic, used for the shared storage which is used to present LUNs to the SOFS cluster. These LUNs are then added as CSV and this is where the SMB3 shares are landing on.
NIC3 and NIC4 are converged using native NIC teaming with Team NICs for Management, CSV, and SMB Traffic.

DP_SOFSDNS1

When creating your Client Access Point (CAP) for the SOFS, the cluster service will register all the network interface IPs, that have the “Allow clients to connect through this network” setting enabled, in DNS for the CAP.

DP_SOFSDNS2

As shown below I have 3 cluster networks enabled for “Cluster and Clients”.
DP_SOFSDNS3

These networks are automatically detected in the Wizard:
DP_SOFSDNS4
Since I have 2 cluster nodes, by default 6 records in total are added to the DNS zone for the CAP:
DP_SOFSDNS5

All clients that resolve “SOFS1” will get Round-Robin DNS an IP of the SOFS server, including the IP’s in the SMB networks.
This is fine for your (Hyper-v) clients in the SMB networks, but for clients only in the Management network this causes connectivity errors.
If you take Virtual Machine Manager for example, for every refresh it will lookup the DNS record and tries to connect and if not successful it will show error messages like:

DP_SOFSDNS6
This is why you do not want to register your SMB NICs in DNS.

You can disable the NICs registering in DNS by unchecking this checkbox on the NIC:
DP_SOFSDNS7

You could also set this with PowerShell:

Get-NetConnectionProfile – InterfaceAlias “SMB” | Set-DnsClient –RegisterThisConnectionsAddress $false

NOTE: If you keep this checkbox checked but do not fill in the DNS servers on the NIC
your will receive cluster error messages saying your SOFS could not register in DNS.

ExcludeNetworks parameter

If we take a closer look at the SOFS cluster resource with Powershell there are a two interesting parameters that will catch the eye; InUseNetworks and ExcludeNetworks.
DP_SOFSDNS8

The InUseNetworks parameter contains the GUIDs of the Cluster Networks that are used for the SOFS recource.
The ExcludeNetworks parameter is empty by default and as the name of the property reveals, you are able to exclude networks that the resource may use.

This setting will cause the same problems as stated above.
Your management clients are not able to communicate with the SOFS over the management network.

If you still want to exclude the “MGT” network for being used for the SOFS Cluster Resource, this property can be set with Powershell:

# Get Cluster Resource
$SOFS= Get-ClusterResource "SOFS1"

# Get Cluster Network ID for "MGT" Network
$NetworkID = (Get-clusternetwork -name "MGT").id

# Set Cluster Network ID in ExcludeNetworks property
Set-ClusterParameter -InputObject $SOFS -Name ExcludeNetworks -Value $NetworkID

# Get Cluster Resource Parameters
$SOFS | Get-ClusterParameter | ft -AutoSize


The ExcludeNetworks parameter is now filled with the GUID of the Cluster Network.

The “InUseNetworks” updates the value automatically, removing the GUID that is now present in the ExcludeNetworks parameter.

The resource in Failover Cluster Manager is also not showing the excluded network anymore.
DP_SOFSDNS10
The cluster also updates the DNS records so only IP addresses in the right subnet are registered in DNS.
DP_SOFSDNS11

SMB Multichannel Constraints

SMB Multichannel Constraints restricts which network can be used for SMB3 to a certain endpoint.
These constraints are configured on the client side and have to be configured for each client, and each SOFS endpoint individually.

The SMB3 protocol prioritizes NICs to use by default based on speed and RDMA capabilities.
If you have 2x 1GbE NICs for management and 2x 10GbE for SMB it will use the 10GbE NICs first before sending traffic over the 1GbE NICs, although it is not excluded for use.
When having 2x 10GbE and 2x 10GbE RDMA NICs, the RDMA NICs will be preferred.

You probably only want to setup constraints if you have identical NICs (same speed) and/or if you want to force SMB traffic over certain NICs.

You can create a new SMB Multichannel Constraint using the New-SmbMultichannelConstraint cmdlet

New-SmbMultichannelConstraint -ServerName SOFS1 -InterfaceAlias “vEthernet (SMB), “vEthernet (SMB2)

DP_SOFSDNS12

CAUTION: This constraint is only for the Netbios name “SOFS1”.
You will need to create an additional constraint for the FQDN!

Using the Get-SmbMultichannelConnection will show the SMB connections are constrained to the right interfaces. You will need to generate some SMB3 traffic to kickstart SMB Multichannel.
DP_SOFSDNS13

If you have any questions or feedback, leave a comment or drop me an email.

Darryl van der Peijl
http://www.twitter.com/DarrylvdPeijl

The post Scale-Out File Servers – DNS Settings appeared first on Darryl van der Peijl.

Get-MgmtSvcRelyingPartySettings bug fixed

$
0
0

In Windows Azure Pack UR4 I discovered a bug concerning the Get-MgmtSvcRelyingPartySettings cmdlet.
I’m proud to say this is fixed in the upcoming UR5 release which also contains the following features and bugfixes:

- Differencing disks are now optional in the VM Role when used with VMM UR5. (This got the fourth highest number of votes in the IaaS category on UserVoice! We are listening, keep giving us the feedback!)

- Support for SQL Server Resource Governor with SQL Server 2014. Now you can create Plans with limits to what/how much SQL Server resources can be consumed by tenants. For more info click here.

- Support for disabling native Network Resource Provider to allow 3rd party Network Resource Providers integration with Azure Pack.

- Tenants can now see information about what type of memory (dynamic/static) their VMs have, along with corresponding Memory Startup and Maximum values.

- Get-MgmtSvcRelyingPartySettings PowerShell cmdlet returns the settings of the correct namespace.

I used the following video to show the productteam the bug.
If your interested in the background, take a look :)

https://onedrive.live.com/redir?resid=B2DE57561D91920!975&authkey=!AGheLYjvOQTej18&ithint=video%2cmp4

The post Get-MgmtSvcRelyingPartySettings bug fixed appeared first on Darryl van der Peijl.

Viewing all 26 articles
Browse latest View live